P2199 Intake Air Temperature Sensor 1/2 Correlation
OBD-II Trouble Code Technical Description
Intake Air Temperature Sensor 1/2 Correlation
What does that mean?
This generic powertrain diagnostic trouble code (DTC) typically applies to many OBD-II vehicles. That may include but is not limited to vehicles from Ford, Chevrolet, GMC, VW, Pontiac, Honda, Nissan, Mazda, etc.
If you have been faced with diagnosing a code P2199, you need to know that it means that the powertrain control module (PCM) has detected a discrepancy in the correlating signals between two separate intake air temperature (IAT) sensors.
Multiple IAT sensors are normally used exclusively in vehicles with more than one throttle body. Separate IAT sensors are monitored in comparison (with each other) primarily to ensure that no obstructions are impeding air flow to either side of the engine intake.
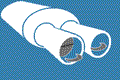
Typical IAT sensor composition includes a thermal resistor that protrudes from a plastic housing on a two-wire pedestal. The plastic housing is inserted into the air intake pipe or air filter housing and sealed with a soft rubber grommet.
Another IAT sensor design integrates the thermal resistor into the mass air flow (MAF) sensor housing. The thermal resistor may be parallel with the MAF sensor hot wire or in a recessed area away from air flow.
The IAT sensor thermal resistor extends into the air inlet so that intake air flows across it as it is drawn into the intake. As intake air temperature increases, the level of resistance in the IAT resistor decreases. This causes circuit voltage to move towards the maximum reference point. When intake air is cooler, IAT sensor resistance increases, resulting in decreased IAT sensor circuit voltage. The PCM receives these variations in IAT sensor signal voltage as changes in intake air temperature. It also makes a comparison between individual IAT sensor signals and reacts accordingly.
A code P2199 will be stored and a malfunction indicator lamp (MIL) may be illuminated if the PCM detects voltage signals from the separate IAT sensors which differ by more than the maximum allowable threshold. MIL illumination may require multiple ignition cycles with a failure.
Intake Air Temperature (IAT) Sensor:
What is the severity of this DTC?
IAT sensor input is critical to fuel delivery and ignition timing. A stored code P2199 should be treated as severe.
What are some of the symptoms of the code?
Symptoms of a P2199 trouble code may include:
What are some of the common causes of the code?
Causes for this code may include:
What are some P2199 troubleshooting steps?
Begin with an inspection of the air filter element. It should be inserted into the housing as intended – free of dirt and debris.
If the air filter element is relatively clean and installed properly, perform a visual inspection of IAT sensor system wiring and connectors.
A diagnostic scanner, an infrared thermometer (with a laser pointer), a digital volt/ohmmeter (DVOM), and a source of reliable vehicle information will be needed to diagnose a P2199.
Upon completion of a visual inspection, connect the scanner to the vehicle diagnostic port and retrieve all stored codes and freeze frame data. Write this information down for later. Clear the codes and test-drive the vehicle to see if the P2199 is reset.
Obtain diagnostic flow charts, wiring diagrams, connector pin-out charts, component testing procedures/specifications, and connector face views from your vehicle information source. This kind of information, in addition to applicable technical service bulletins, may be instrumental in the diagnostic process.
Disconnect the PCM (and all related controllers) before testing individual system circuits with the DVOM. This will help to prevent controller damage.
Test each IAT sensor:
Test the reference circuit:
If it is not, test the same circuit at the PCM connector. If no reference voltage signal is detected there, suspect a PCM problem or a programming error.
Test each IAT sensor signal circuit:
This is done by comparing individual IAT sensor data (collected in step 6 of the previous section) with desired IAT voltage (reflected on the temp to voltage chart).
If either of the IAT sensors do not reflect the appropriate degree of voltage (according to the temp to voltage chart) suspect that it is faulty.
If IAT and ambient air temperature sensor signal circuits both reflect the appropriate amount of voltage:
Need help?
Let us fix your problem. You are most welcome our diagnosis experts have in most cases the knowledge and skills to find the cause of the error code p2199 and to solve the problems.
Make an appointment for diagnosis
"Delete Error Code Permanently, Disable DTC Error Code Function for p2199 in the ECU"
In extreme cases, we even have the option to permanently remove the specific DTC p2199 and disable the function of the specific error code in the ECU. All other fault code functions will then continue to work to protect the engine. This is different from clearing an error code with a diagnostic device. We have the option to permanently remove the function of the specific error code, so that it never comes back. Also emergency running that occurs on the specific error code can be solved in most cases.
Of course we prefer to first try to solve the cause of the error code, but sometimes the only solution is to permanently disable the DTC function of p2199.